
WORKOUTS
Glute Workout Machine: Your Ultimate Guide to Sculpted Glutes

When it comes to achieving toned, strong, and balanced lower-body muscles, the glute workout machine stands out as one of the most effective tools in the gym. Whether you’re a fitness enthusiast, an athlete, or someone embarking on a body-toning journey, understanding how this machine supports glute development is key to optimizing your results.
Why Use a Glute Workout Machine?
The glute workout machine is specifically engineered to isolate and engage the gluteus maximus, medius, and minimus. Unlike squats and lunges that also activate supporting muscle groups, these machines deliver a more concentrated focus, ensuring that every repetition targets your backside with precision. This not only helps in muscle activation but also leads to enhanced strength, symmetry, and posture.
Glutes play a central role in athletic performance, lower-back support, and even daily movements like walking or standing. A dedicated machine helps individuals activate their glutes properly—an essential benefit in a world dominated by sedentary lifestyles.
Types of Glute Workout Machines
Hip Thrust Machine
A staple in many gyms, the hip thrust machine enables controlled and safe hip extension, directly working the glutes. It allows users to add resistance progressively and maintain form throughout.
Cable Kickback Machine
This machine involves using a cable attachment around the ankle, enabling glute kickbacks with customizable resistance. It also activates the hamstrings and lower back for a compound effect.
Glute Ham Developer (GHD)
Popular in strength and conditioning programs, the GHD allows for posterior chain exercises, including glute raises and hamstring curls. It helps improve glute-hamstring coordination.
Stair Stepper with Resistance
Though not a traditional glute machine, modern stair steppers include features to target glute muscles through deep step settings and resistance control.
Leg Press with Foot Placement Adjustment
With high and wide foot placement, the leg press machine can shift focus to the glutes. Adjusting the seat angle and foot position helps in glute-centric variations.
Benefits of Using a Glute Workout Machine
Targeted Muscle Activation
The primary advantage is muscle isolation. Users can focus solely on glutes without the interference of quads or lower back strain, which is common in free-weight exercises.
Customizable Resistance
Glute workout machines allow you to adjust weights and settings according to your fitness level. This scalability is essential for both beginners and advanced athletes.
Reduced Risk of Injury
With fixed movement paths, these machines promote safe lifting techniques. Proper form reduces pressure on the knees and spine, making them accessible for rehabilitation and low-impact training.
Time Efficiency
Since the machine ensures proper alignment and consistent tension, users can achieve better results in less time compared to multi-muscle compound exercises.
Aesthetic Improvement
Toned glutes enhance body aesthetics, improving both your confidence and physical symmetry.
Best Practices for Using a Glute Workout Machine
Warm-Up is Essential
Before engaging with any glute machine, a proper warm-up involving dynamic stretches or light cardio ensures muscles are primed for activation.
Focus on Mind-Muscle Connection
To fully benefit from the machine, it’s crucial to consciously contract your glutes during each movement. Slow and controlled reps yield better outcomes.
Avoid Overcompensation
Do not let your lower back or legs take over the movement. Adjust seat height, resistance, and posture to maintain glute dominance throughout.
Progressive Overload
Gradually increase resistance to challenge your muscles continuously. A static routine will lead to stagnation, so varying weights, angles, and rep ranges is important.
Recovery and Nutrition
Your glutes grow outside the gym. Ensure adequate rest, protein intake, and hydration for optimal recovery and performance.
Comparison Table: Top Features of a Glute Workout Machine
| Feature | Cost Range | Efficiency | Ease of Use | Scalability | Benefits |
| Hip Thrust Machine | Moderate to High | Very High | Easy | Excellent | Deep glute activation, low back safety |
| Cable Kickback | Low to Moderate | High | Moderate | Excellent | Great for glute isolation and shaping |
| GHD Machine | Moderate | High | Moderate | High | Posterior chain strength and flexibility |
| Stair Stepper | High | Moderate | Very Easy | Moderate | Cardiovascular plus glute engagement |
| Leg Press (Modified) | Moderate | Moderate to High | Easy | Excellent | Glute-targeting with adjustable stance |
Factors to Consider Before Buying a Glute Workout Machine
Space Availability
Some glute machines, especially hip thrust setups and stair steppers, occupy significant floor space. Ensure your workout area can accommodate the machine comfortably.
Your Fitness Goals
For toning and aesthetics, cable machines and glute kickbacks may suffice. For building strength and mass, opt for hip thrust or GHD machines.
Budget
High-end machines with multiple features can be costly. However, budget-friendly options also exist that provide adequate functionality without breaking the bank.
Build Quality and Safety
Check for durable materials, proper padding, and solid weight mechanisms. Safety features such as lock systems and ergonomic support can make a difference.
Adjustability
Machines that allow you to modify angles, seat heights, and resistance offer more exercise variation and cater to different body types.
Expert Insights on Glute Activation
Fitness professionals emphasize that many people suffer from “gluteal amnesia” due to prolonged sitting. This leads to underactive glutes, tight hip flexors, and compromised movement patterns. Regular use of a glute exercise machine helps reverse this trend by reactivating dormant muscles and reestablishing proper movement mechanics.
Moreover, experts recommend pairing glute machine exercises with stretching and mobility routines to enhance flexibility and muscular coordination. This integrative approach ensures both strength and injury prevention.
Top Exercises on Glute Workout Machines
Seated Hip Abductions
This exercise strengthens the outer glutes and hips. Focus on squeezing the glutes at the peak of each rep.
Standing Cable Kickbacks
Maintain a slight forward lean and avoid swinging your torso. Keep the glute under tension for the entire movement.
Hip Thrust with Pause
Adding a pause at the top of a hip thrust increases time under tension, leading to hypertrophy and strength gains.
Single-Leg Press (Glute-Focused)
Use a high foot placement with a slight outward turn to target the glutes effectively.
Reverse Stair Climbing
Lean slightly forward and push through the heel on each step to ensure glute activation over quads.
Mistakes to Avoid on a Glute Workout Machine
- Rushing Reps: Fast movements often reduce glute engagement and increase injury risk.
- Poor Posture: Avoid arching your back or leaning excessively; maintain a neutral spine.
- Neglecting Progressive Load: Sticking with the same resistance for weeks limits growth.
- Skipping Activation Drills: Pre-activation with bodyweight glute bridges or clamshells enhances machine effectiveness.
- Overtraining: Muscles grow with rest. Training glutes every day without recovery may hinder progress.
Conclusion
Incorporating a glute workout machine into your fitness routine can significantly accelerate your journey toward stronger, more defined glutes. These machines offer precision, safety, and scalability—making them ideal for users at all levels. By following proper techniques, adjusting for personal needs, and progressively challenging your muscles, you can harness the full benefits of glute-focused training.
FAQs
What is the most effective glute workout machine for beginners?
The hip thrust machine is ideal for beginners due to its simplicity, safety features, and high glute engagement. It provides a stable range of motion and is easy to adjust based on your fitness level.
How often should I use a glute exercise machine?
Most trainers recommend 2–3 sessions per week to allow sufficient recovery. Pairing machine work with bodyweight or resistance band exercises can enhance results without overtraining.
Can I build glute muscles using only machines?
Yes, but combining machine workouts with compound exercises like deadlifts and lunges offers the best results. Machines help in isolation, while free weights improve overall strength and balance.
Are glute exercise machines safe for people with lower back pain?
Many machines, such as the hip thrust and cable kickbacks, are designed to reduce stress on the lower back. However, individuals with pre-existing conditions should consult a fitness professional before use.
Do glute machines help in reducing hip dips?
Glute-focused machines can enhance muscle volume around the hips, potentially reducing the appearance of hip dips. Consistency, however, is key to seeing aesthetic changes.
Can glute workout machines be used at home?
Yes. Many compact glute machines are designed for home use. Look for foldable or multifunctional options if space is limited. Resistance bands and mini-machines also serve as good alternatives.
The suicides workout is a powerful training technique designed to test your limits, improve cardiovascular endurance, and build mental toughness. Whether you’re an athlete, a fitness enthusiast, or someone looking to shed fat and get in shape, this high-intensity drill packs a punch. Its versatility, simplicity, and intensity make it a staple in sports training and boot camps.
What Is a Suicides Workout?
A suicides workout, also known as “suicide runs” or “line drills,” involves sprinting to a series of progressively distant points and returning to the starting line after each run. Originally used in sports like basketball and football, this drill is now embraced in a wide variety of training environments, from military boot camps to CrossFit sessions.
In its basic form:
- Begin at a baseline.
- Sprint to the first marker (e.g., 10 meters), touch the ground, and return.
- Continue to the next farthest point and repeat.
- Complete several intervals based on your training goal.
This shuttle-style movement targets aerobic and anaerobic energy systems, improving overall conditioning.
Benefits of a Suicides Workout
This drill offers much more than just cardio. Here’s why it stands out among fitness routines:
Improves Cardiovascular Endurance
The fast-paced nature increases your heart rate, conditioning your heart and lungs to work more efficiently during high-intensity efforts.
Accelerates Fat Burn
Short bursts of maximum effort followed by brief rests trigger the afterburn effect (EPOC), helping your body burn calories long after your session ends.
Boosts Agility and Speed
Regular practice sharpens your reflexes, footwork, and the ability to rapidly change direction—crucial for athletes in competitive sports.
Mental Resilience
Repeated intense sprints test your determination, forcing you to push past fatigue and stay focused under pressure.
Total-Body Engagement
This conditioning drill works your quads, hamstrings, calves, core, and even arms, especially if combined with other bodyweight exercises between sprints.
Comparison Table: Suicides Workout vs Conditioning Drills Overview
| Feature | Suicides Workout | Treadmill Sprint | Rowing Machine | Battle Ropes | Circuit Training |
| Cost | Free | High | High | Medium | Varies |
| Efficiency | Very High | Moderate | High | Medium | High |
| Ease of Use | Easy | Easy | Medium | Easy | Medium |
| Scalability | Excellent | Good | Good | Limited | Excellent |
| Benefits | Speed, Endurance, Fat Loss | Cardio, Fat Burn | Strength & Stamina | Arm Toning | Overall Fitness |
How to Perform Suicides Workout Correctly
Start With a Warm-Up
Don’t jump into sprints cold. Perform five minutes of light jogging followed by mobility drills like leg swings, high knees, and arm circles.
Step-by-Step Execution
- Mark lines at intervals—5, 10, 15, and 20 meters.
- Sprint to the first marker and back.
- Repeat for each increasing distance.
- Rest 30–60 seconds and complete 3–6 rounds depending on your fitness level.
Helpful Tips
- Pivot low to maintain balance and control.
- Use short, explosive strides.
- Drive your arms with each step.
- Stay relaxed while breathing steadily.
Workout Variations for Every Fitness Level
To keep things interesting, try modifying this high-speed drill in the following ways:
Lateral Runs
Instead of sprinting forward, move sideways to improve lateral agility and hip stability.
Add Burpees
After each touchpoint, do a burpee before running back. This increases heart rate and works the upper body.
Use Weights
Wear a weighted vest or hold light dumbbells to add resistance and build muscular endurance.
Incorporate Stairs
Find a staircase or stadium steps and use them for short explosive climbs and descents.
These variations provide different challenges, keeping the workout effective and engaging.
Ideal for Athletes and Everyday Fitness
This sprint-style drill is popular across various disciplines because of its many benefits:
- Sports players use it to simulate game conditions.
- Military personnel include it in boot camp-style training for full-body conditioning.
- Weight-loss seekers value its intensity and metabolic burn.
- Busy professionals appreciate its time efficiency.
- Fitness trainers recommend it for developing both aerobic and anaerobic capacity.
Beginners should start with caution and adjust the intensity to match their current level.
Avoid These Common Mistakes In Suicides Workout
Neglecting Warm-Ups
Jumping straight into sprints can cause strains. Always start with dynamic stretches and light cardio.
Bad Turning Mechanics
Improper pivoting leads to ankle and knee injuries. Focus on stable, controlled turns at each marker.
Training Too Frequently
Your body needs rest to recover and grow stronger. Limit to 2–3 sessions per week, especially in the beginning.
Hard Training Surfaces
Avoid concrete or asphalt. Choose grassy fields, padded gym floors, or synthetic turf to minimize joint stress.
Programming Suicides Workout into Your Weekly Routine
Here’s a simple plan for integrating this drill into your workout schedule:
| Day | Activity |
| Monday | Upper Body Strength |
| Tuesday | Shuttle Runs + Core Work |
| Wednesday | Yoga or Active Recovery |
| Thursday | Lower Body Strength |
| Friday | Interval Sprints + Bodyweight HIIT |
| Saturday | Light Cardio or Outdoor Activities |
| Sunday | Rest |
Adjust reps and sets based on your training goals.
Why Coaches Love Suicides Workout
Trainers and coaches from various sports disciplines swear by this conditioning drill for its ability to build stamina under pressure. Since it mimics real-game conditions—like chasing a ball, backtracking on defense, or rushing in a counterattack—it’s ideal for sport-specific fitness.
Athletes who regularly use this technique often notice improvements in match performance, energy levels, and concentration.
Safety Guidelines for Optimal Results
Stay Hydrated
Intense running drills cause significant fluid loss. Drink water before, during, and after the session.
Choose the Right Shoes
Use shoes with good arch support, shock absorption, and grip to prevent foot fatigue and slips.
Prioritize Recovery
Post-workout stretches, proper nutrition, and adequate sleep are essential for reducing soreness and maximizing results.
Suicides in Functional and Mental Conditioning
This style of interval training also strengthens your mind. Here’s how:
- Mental Grit: You learn to push through discomfort.
- Focus: Staying aware of technique and breathing under fatigue builds sharpness.
- Consistency: It encourages discipline, which translates into other life areas.
These elements contribute to improved overall well-being and mental toughness.
Adaptations for Special Needs or Beginners
This drill is scalable. Depending on your fitness level or physical condition, here’s how you can modify it:
- Walk instead of sprinting.
- Use shorter distances.
- Increase rest time.
- Substitute running with cycling or elliptical intervals.
It’s important to listen to your body and never sacrifice form for speed.
Conclusion
The suicides workout remains one of the most effective conditioning drills available today. Its simplicity, power, and ability to improve full-body fitness make it a top choice for athletes and everyday individuals alike. With proper form, consistency, and smart programming, this drill can transform your speed, stamina, and overall health. Whether you’re chasing peak performance or just want to break a sweat, it’s a worthy addition to your fitness toolbox.
FAQs
What is a suicides workout?
It’s a sprint drill involving short bursts of running to increasingly distant markers and returning after each, designed to improve speed, stamina, and agility.
How many times a week should I perform this drill?
Start with 2–3 sessions per week, allowing time for muscle recovery between workouts.
Can I do suicides workout at home?
Yes, all you need is a small open space and some markers. A driveway, backyard, or hallway can work in a pinch.
Is this suitable for beginners?
Absolutely, with modified distances and intensity. Gradually increase rounds and decrease rest time as your fitness improves.
What equipment is required?
Just markers or cones to define distances. Optional gear includes a weighted vest, stopwatch, or resistance bands for added variety.
How does it compare to treadmill running?
It’s more dynamic, involves quick direction changes, and builds both agility and explosive power, making it more sport-specific and intense than standard treadmill workouts.
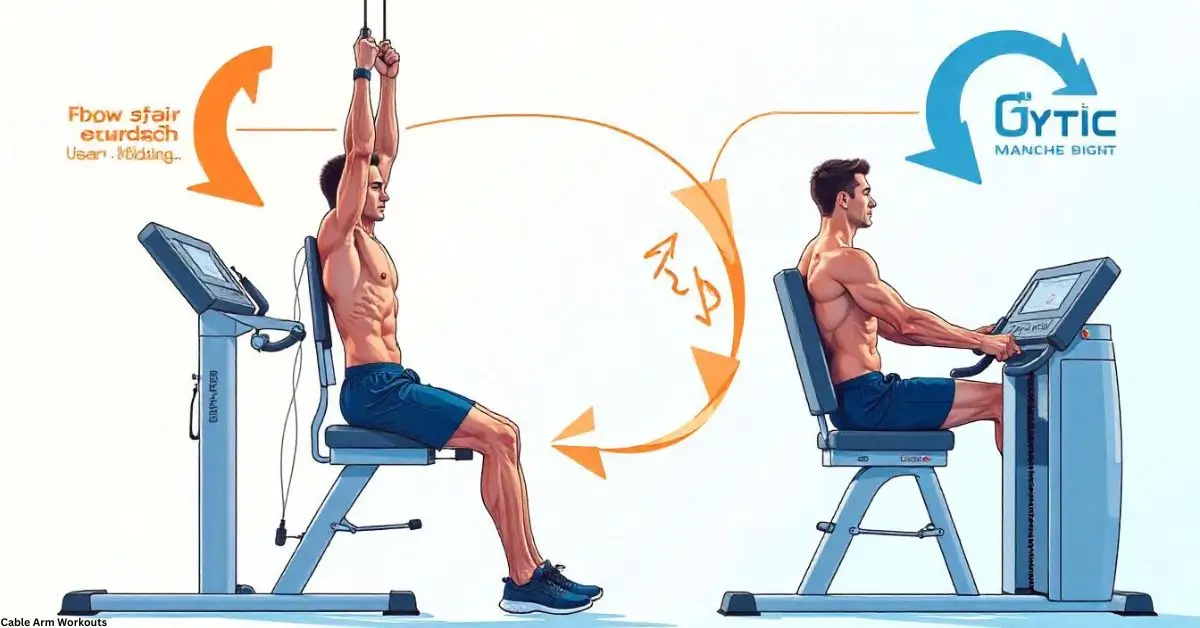
If you’re aiming for sculpted biceps, defined triceps, and overall stronger upper limbs, cable arm workouts should be your go-to strategy. These dynamic exercises deliver consistent resistance and allow for greater muscle activation, leading to better results compared to free weights alone.
Unlike traditional dumbbell routines, cable machines offer constant tension throughout each movement, enhancing muscle engagement. Whether you’re just starting out or are an experienced gym-goer, incorporating cable-based routines into your regimen can unlock new levels of arm strength and aesthetics.
Why Choose Cable Arm Workouts?
Cable arm exercises provide several advantages over conventional weight training. The adjustable pulley systems allow for precise targeting of specific muscle groups, while minimizing joint stress. These workouts are especially valuable for people seeking better form control, improved time under tension, and continuous resistance.
Benefits of Cable-Based Arm Training
- Consistent tension on muscles during the entire range of motion
- Greater control and safety, especially for beginners
- Customizable to various fitness levels and goals
- Less strain on joints and tendons compared to barbells
- Functional movement patterns that mimic daily activities
Anatomy of an Effective Cable Arm Workout
Understanding the structure of your arms is key to maximizing your cable workouts. The primary muscles involved include:
Biceps Brachii
Located on the front of your upper arm, the biceps are responsible for elbow flexion and forearm supination.
Triceps Brachii
These muscles sit at the back of the upper arm and are responsible for elbow extension.
Brachialis and Brachioradialis
Located under the biceps, these assist with elbow movement and give the arms a fuller appearance when developed.
Best Cable Arm Workouts for Muscle Growth
To target all parts of your arms effectively, the following cable armexercises combine both pushing and pulling movements. They are suitable for most fitness levels and can be adapted for home or commercial gyms.
1. Cable Bicep Curls
Muscles targeted:
Biceps Brachii
How to do it:
- Attach a straight bar to the low pulley.
- Stand upright, grasp the bar with an underhand grip.
- Curl the bar toward your chest, keeping elbows tucked.
- Slowly lower and repeat.
Pro tip:
Avoid swinging; keep your core tight for better isolation.
2. Cable Triceps Pushdowns
Muscles targeted:
Triceps Brachii
How to do it:
- Use a rope or bar attachment at the high pulley.
- Stand with your elbows close to your sides.
- Push down until your arms are fully extended.
- Return to the start position.
Pro tip:
Do not let your elbows flare out during the movement.
3. Overhead Cable Triceps Extension
Muscles targeted:
Long head of triceps
How to do it:
- Attach a rope to the low pulley.
- Turn away from the machine and lift the rope overhead.
- Extend your arms, squeezing at the top.
- Slowly return.
Pro tip:
Keep your upper arms fixed throughout the motion.
4. Cable Hammer Curls
Muscles targeted:
Brachialis, Brachioradialis
How to do it:
- Attach a rope to the low pulley.
- Hold the rope in a neutral grip (thumbs facing up).
- Curl the rope toward your shoulders.
- Lower and repeat.
Pro tip:
Use controlled motion for maximum impact.
5. Single-Arm Cable Curls
Muscles targeted:
Biceps (unilateral focus)
How to do it:
- Attach a handle to the low pulley.
- Stand sideways to the machine.
- Perform a curl with one hand at a time.
Pro tip:
Unilateral training helps correct muscle imbalances.
Structuring Your Cable Arm Workout Routine
To build strength and size, integrate the exercises above into your training routine with appropriate sets and reps.
Sample Weekly Plan
| Day | Exercise Focus | Sets x Reps |
| Monday | Biceps (Cable curls, hammer curls) | 4 x 12–15 each |
| Wednesday | Triceps (Pushdowns, overhead ext.) | 4 x 10–12 each |
| Friday | Mixed (All cable exercises) | 3 x 15 circuit |
This structure ensures each muscle group gets enough time to recover while maintaining frequency for growth stimulation.
Comparison: Cable Machines vs Free Weights
| Feature | Cable Machines | Free Weights |
| Cost | Higher upfront investment | More affordable |
| Efficiency | Provides constant resistance | Gravity-dependent tension |
| Ease of Use | Beginner-friendly with guides | Requires more stabilization |
| Scalability | Easy to adjust resistance quickly | Limited to available dumbbell sizes |
| Benefits | Improved form, safer workouts | Promotes balance and coordination |
Cable machines offer versatility and safety, making them ideal for consistent arm training without compromising joint health.
Tips for Getting the Most Out of Cable Arm Workouts
Warm Up First
Always begin with light cardio and dynamic stretching to increase blood flow and prepare muscles.
Focus on Time Under Tension
Slowing down each repetition and maintaining muscle tension maximizes hypertrophy.
Avoid Overtraining
Aim for 48 hours of rest between targeting the same muscle group to prevent fatigue and injury.
Maintain Proper Form
Use controlled movements. Improper technique reduces effectiveness and increases the risk of strain.
Track Your Progress
Log your sets, reps, and weight to monitor improvements and maintain motivation.
Who Should Use Cable Arm Workouts?
Cable arm exercises benefit a wide audience, including:
- Beginners seeking guided movement with low injury risk
- Bodybuilders aiming to enhance muscle definition
- Rehabilitation patients focusing on controlled resistance
- Athletes who want balanced arm strength for performance
- Seniors needing safe strength-building options
These workouts serve both informational and transactional intent: educating users and encouraging gym equipment use or purchase.
Conclusion
Cable arm workouts offer one of the most effective, safe, and versatile ways to build stronger and more defined arms. Whether you’re looking to boost muscle growth, improve endurance, or simply tone your upper body, integrating cable exercises into your routine can elevate your fitness game. With consistent practice, proper form, and a balanced routine, you’re bound to see visible results.
FAQs
What muscles do cable arm workouts target?
Cable arm workouts primarily target the biceps, triceps, brachialis, and brachioradialis. They help in building overall arm strength and improving muscle definition.
Are cable arm workouts better than dumbbells?
Cable workouts provide continuous tension throughout the movement, which can lead to better muscle activation. However, combining both cables and free weights yields the best results.
How often should I do cable arm workouts?
You can perform cable arm workouts 2–3 times per week, allowing at least 48 hours between sessions that target the same muscle group for optimal recovery.
Can beginners do cable arm workouts?
Absolutely. Cable machines are beginner-friendly, offering guided movement paths that reduce the risk of injury while building foundational strength.
What’s the ideal rep range for cable arm exercises?
For muscle hypertrophy, aim for 8–15 reps per set. Beginners can start at the higher end of the range with lighter weights, while advanced lifters may use heavier weights for fewer reps.
Do cable arm workouts help with toning?
Yes, consistent cable arm workouts combined with proper diet and cardio can help reduce fat and tone arm muscles effectively over time.
A well-structured calisthenics chest workout can build impressive strength, definition, and muscle mass without the need for weights or gym machines. Whether you’re at home, at a park, or in a minimal-equipment setup, calisthenics offers a powerful, scalable approach to chest development using only bodyweight exercises. This article dives deep into the most effective strategies, exercises, routines, and progressions to help you unlock a strong, sculpted chest through calisthenics.
Why Choose Calisthenics for Chest Training?
Calisthenics training emphasizes natural movement patterns, muscle control, and functional strength. Unlike traditional gym-based workouts, calisthenics engages stabilizing muscles and encourages full-body coordination, making it especially effective for holistic chest development.
Benefits of Calisthenics Chest Workouts
- No Equipment Needed: Perfect for training anywhere, anytime.
- Functional Strength: Builds real-world pushing strength and endurance.
- Joint-Friendly: Reduced strain on joints compared to heavy bench pressing.
- Improved Muscle Control: Encourages neuromuscular efficiency and body awareness.
- Progressive Overload Possible: Via angles, tempo, volume, and advanced variations.
Anatomy of the Chest Muscles
To effectively train your chest, understanding its structure is essential. The chest comprises two main muscle groups:
- Pectoralis Major: The large, fan-shaped muscle covering most of the chest wall. It includes upper (clavicular), middle (sternal), and lower (abdominal) fibers.
- Pectoralis Minor: Located beneath the pectoralis major, it assists in scapular movement and stability.
Each calisthenics chest workout should aim to activate all fibers for balanced muscle development.
Top Bodyweight Exercises for Chest Development
Calisthenics is more than just push-ups. Here’s a breakdown of the most effective exercises to include in your chest routine:
Standard Push-Up (Beginner)
The classic push-up remains a cornerstone of any calisthenics chest workout. It targets the entire pectoral region while also engaging the triceps and anterior deltoids.
Form Tips:
- Keep your body in a straight line from head to heels.
- Lower your chest just above the floor, then press back up.
Incline Push-Up (Upper Chest Focus)
By elevating your hands on a platform, you shift emphasis to the lower part of the chest and reduce resistance, making it ideal for beginners.
Decline Push-Up (Lower Chest Emphasis)
Placing your feet on an elevated surface increases difficulty and targets the upper chest.
Wide Push-Up (Outer Chest)
A wider hand placement increases stretch on the outer pec fibers, maximizing muscle activation.
Archer Push-Up (Intermediate)
This variation mimics a one-arm push-up and is excellent for unilateral strength and hypertrophy.
Pseudo Planche Push-Up (Advanced)
By shifting your weight forward and rotating the hands outward, this movement places intense load on the chest and shoulders.
Ring or Suspension Push-Up
Performing push-ups on unstable surfaces like gymnastic rings recruits more muscle fibers and enhances core engagement.
Explosive Push-Up (Power Training)
This includes clap push-ups or push-offs. It builds explosive power and fast-twitch muscle fibers.
Structured Calisthenics Chest Workout Routine
Here’s a sample workout routine tailored for different skill levels. Perform this 2–3 times weekly with at least 48 hours of rest between sessions.
Beginner Routine
- Incline Push-Ups – 3 sets x 12 reps
- Standard Push-Ups – 3 sets x 10 reps
- Wide Push-Ups – 2 sets x 10 reps
- Negative Decline Push-Ups – 2 sets x 6 reps (slow eccentric)
Intermediate Routine
- Decline Push-Ups – 3 sets x 10 reps
- Archer Push-Ups – 3 sets x 6 each side
- Wide Push-Ups – 2 sets x 12 reps
- Pseudo Planche Push-Ups – 2 sets x 8 reps
Advanced Routine
- Ring Push-Ups – 3 sets x 10 reps
- Explosive Push-Ups – 3 sets x 8 reps
- Archer Push-Ups – 2 sets x 10 reps
- Pseudo Planche Push-Ups – 2 sets x 10 reps
- Incline Clap Push-Ups – 2 sets to failure
Progression Strategies in Calisthenics Chest Training
For continuous results, progressive overload must be applied. Since weights aren’t used in a calisthenics chest workout, consider these methods:
- Increase Reps or Sets: Gradually raise the number of reps or add another set.
- Manipulate Tempo: Slow down the eccentric (lowering) phase.
- Elevate Difficulty: Use harder variations (like pseudo planche or one-arm push-ups).
- Minimize Rest Time: Shorter breaks intensify the workout.
- Add Isometric Holds: Pause at the bottom of push-ups to boost strength.
Mistakes to Avoid in a Calisthenics Chest Workout
Even experienced athletes can fall into common traps. Ensure optimal results by avoiding these:
- Poor Form: Letting hips sag or flaring elbows too wide reduces effectiveness and raises injury risk.
- Neglecting Warm-Ups: Always begin with dynamic movements to prep the joints and muscles.
- Skipping Recovery: Muscles grow during rest, not while training.
- Overemphasizing Volume: Quality trumps quantity; avoid junk reps.
- Neglecting Nutrition: Muscle-building depends heavily on protein intake and overall diet.
Comparison Table: Calisthenics vs Traditional Weight Training
| Feature | Calisthenics Chest Workout | Traditional Chest Workout |
| Cost | Free | Gym membership, equipment needed |
| Efficiency | High – engages multiple muscles | Moderate – isolates specific muscles |
| Ease of Use | Easy to start anywhere | Requires machines or weights |
| Scalability | Progressive bodyweight variations | Easily scalable with weights |
| Benefits | Builds functional strength & control | Builds size & max strength |
Integrating Core and Triceps for Balanced Push Power
A great calisthenics chest workout also strengthens adjacent muscle groups. The chest works in tandem with triceps and core in all pushing movements.
- Triceps Push-Ups: Narrow hand placement targets triceps and inner chest.
- Hollow Body Holds: Builds core stability, essential for strict form.
- Plank to Push-Up: Combines chest activation with core engagement.
Recovery and Nutrition for Maximum Gains
For your muscles to grow and recover, you must prioritize post-workout habits:
- Hydration: Keeps joints lubricated and muscles energized.
- Protein Intake: Essential for muscle repair and growth.
- Sleep: Aim for 7–9 hours to boost hormonal balance and recovery.
- Mobility Work: Stretching and foam rolling can reduce stiffness and enhance flexibility.
Transitioning to Advanced Movements
Once you master basic variations, consider progressing to:
- One-Arm Push-Up
- Ring Flys
- Wall Planche Push-Ups
- Handstand Push-Ups (for upper chest and shoulders)
These moves demand exceptional control and strength and can significantly enhance your physique.
The Best Time and Frequency for Training
Train your chest 2–3 times weekly, allowing at least one full day of rest between sessions. Morning workouts may boost metabolism, while evening workouts allow for improved strength due to daily mobility.
Calisthenics Chest Workout for Aesthetic and Strength Goals
A well-structured calisthenics chest workout doesn’t just build strength — it sculpts an aesthetically pleasing, balanced physique. By adjusting volume, intensity, and movement variations, you can tailor your training to achieve specific goals, whether that’s size, symmetry, or pushing power.
Conclusion
Starting a calisthenics chest workout routine opens the door to functional strength, mobility, and muscle aesthetics — all without weights. By mastering fundamental exercises and progressing with consistency, you can build an impressive chest through discipline, not equipment. Incorporating smart programming, recovery, and proper form will ensure you achieve lasting results with bodyweight alone.
FAQs
What is the best calisthenics chest workout for beginners?
Beginners should start with incline and standard push-ups, focusing on perfect form. Gradually increasing reps and progressing to wide and decline push-ups will help develop foundational strength.
Can you build a big chest with calisthenics alone?
Yes, you can build a muscular chest using bodyweight exercises by progressively increasing the difficulty of movements, ensuring proper nutrition, and maintaining a consistent workout routine.
How often should I do calisthenics chest workouts?
Train your chest 2 to 3 times a week, allowing at least 48 hours between sessions for adequate muscle recovery and growth.
Are push-ups enough for chest development?
Push-ups are highly effective, especially when modified in form (e.g., incline, decline, archer). To optimize growth, variety and progressive overload are key.
How long does it take to see results from calisthenics chest training?
Visible results can appear within 4 to 8 weeks with consistent training, proper nutrition, and recovery. Everyone’s timeline varies based on genetics and effort.
Do calisthenics chest workouts work the upper, middle, and lower chest?
Yes, by adjusting push-up angles (decline for upper chest, flat for middle, incline for lower), calisthenics can effectively target all areas of the pectoral muscles.
-

 GENERAL9 months ago
Waterless Skincare: The Future of Potent, Eco-Friendly Beauty
-

 GENERAL9 months ago
Gary Brecka Supplements: Unlocking Peak Human Performance
-

 HEART TIPS9 months ago
Common Heart Home Health: Trusted Cardiac Care at Home
-

 GENERAL9 months ago
Activia Yogurt Nutrition Facts You Shouldn’t Ignore
-
 WORKOUTS9 months ago
Butt Exercise Machine: Intelligent Exercises to Change Your Glutes
-

 HEALTHY DIET9 months ago
Arbonne 30 Days to Healthy Living
-

 GENERAL9 months ago
Healthy Living at Home for a Better You
-

 HEART TIPS9 months ago
Theralogix NeoQ10 Coenzyme Q10 Supplement – Heart Health